No Chaos No Order

October 27, 2014

Laundry Room: cleaning supplies

Filed under: health, home — fairyguts @ 5:27 am

Long ago I started an experiment around cleaning solutions. While I was looking for cleaner recipes to try out, I noticed a rash of Pinterest pins exclaiming “How to Turn a Mason Jar into a Squirt Bottle!” showcasing their finished projects. And, while I laud their accomplishments, I could not see the benefit in that. I couldn’t imagine my hand fitting between the trigger and the mason lid – I’d have to hold my smallest two fingers out. And then, because of the broad lid, I’d have to hold my hand cocked awkwardly perpendicular. But, finally, I was confused … I can understand the interest in using glass over plastic, but why not use the screw-lid glass water or juice bottles already available at most grocery stores? And, since I was using plastic bottles with squirting tops that were so crummy they only worked 60% of the time, I decided to do so.  In the experiment you can see the bottles with juice labels still on them, but following are the snazzed up versions for my snazzed up laundry cupboards.

2013-11-10 16.00.36

Galvanized buckets from a feed store ($8 each).

2013-11-12 14.25.59

An exacto-knife is my vinyl cutter to label my buckets of cleaning equipment.

2013-11-19 18.42.14

Nice and cozy in their home!

2013-11-19 18.41.20

Random storage needs are covered cardboard boxes. “Bulbs,” “Basics,” and “Batteries”

October 22, 2014

Crochet Toy Baskets

Filed under: heart, home — Tags: — fairyguts @ 10:07 pm

DSC00202  DSC00194

I was storing the living room toys in a basket in the media cabinet. It worked well for a while, but my helper-baby, aka danger-baby was starting to break it and use it for even more danger. I needed something else to hold the toys, but not structured enough to be used as a step ladder.  After a look through Pinterest for inspiration, I decided to crochet some baskets using old t-shirts, scrap fabric, and left over yarn. They turned out pretty nice and even my littlest baby can get at what he wants.

2014-09-29 09.34.36 2014-09-29 09.34.45


PS: Toys rarely stay in the baskets right now.

October 20, 2014

Random History: HS WordPerfect Manual

Filed under: heart — fairyguts @ 10:12 pm

When I was in high school the “Computer Science” class was mostly about using WordPerfect and Excel (or what would become Excel). We ended up making ourselves a manual for all the different correspondence and forms we would need to use with the appropriate formatting. I wrote some silly things in here, so was holding on to it.  But I don’t need it and recycled it recently.

These pictures are really for me, but everyone’s welcome to read them sideways!

DSC00246DSC00245 DSC00244 DSC00243 DSC00242 DSC00241 DSC00240 DSC00239 DSC00238 DSC00237 DSC00236 DSC00235 DSC00234 DSC00233 DSC00232 DSC00231 DSC00230

October 17, 2014

Media cabinet

Filed under: health, home — fairyguts @ 10:03 pm

In our old home our media equipment was stored in the basement – everything gloriously exposed, reveling in its awkward electrical hodg-podg-ery. Our new home, though, doesn’t have space for that. We decided to keep it in the living room and the mess of cables and flashing lights and game controllers was both a dust- and baby-magnet. To make it worse, we didn’t have furniture to accommodate it all. We used a sideboard with a folding table on top, and a homemade counter/table with landscaping fabric wrapped around the base.  We also used old boxes and sleeping bags shoved along sides and in spaces to keep our danger-baby from climbing up onto the rickety tables.  Mmmm – attractive!  (Which explains why there is no photograph.)

I couldn’t stand it any more and measured all of the things we wanted to be with the media and I started shopping.  We don’t have lots of money, so I needed to be careful with my funds.  I started haunting the Habitat for Humanit ReStore and finally found something to work…

2013-09-19 14.27.20

measurements and fantasy

2014-02-15 10.53.46

Ooo! A sale at the ReStore!

2014-02-15 10.52.41

Hmmm … A two-piece desk, but they are priced separately and the top one seems very promising.

2014-02-15 10.52.29

Ooo – totally acceptable price!

Before shopping, I wrote the measurements for each media component on its own post-it note to help me experiment with placement.

2014-02-15 10.51.50 2014-02-15 10.51.25 2014-02-15 10.51.10

If I add a second shelf inside the cupboard, everything would fit!  I bought it and sent my hubby back to bring it home.

I still had some changes to maximize the space and minimize the visibility of things or the possibility for kids to play with it.

First, we added a second shelf and holes in the back for ventilation.

DSC00174

A lock for one side and a latch for the other keeps the kids out.

DSC00172

DSC00173

But the trickiest part was cutting and finishing a hole in the cabinet door to put the center speaker inside. With some scrap wood behind the speaker, it rests directly against the door but little hands can’t push it out of the way to reach in.

DSC00171

I think it looks pretty nice now!  We still have the cable box out and another component that needs to be exposed for remote control use, but eventually I’d like to install glass doors in the far right opening to put them in. For now, we keep toys there!

October 13, 2014

Quick review of O.N. chapters

Filed under: home — fairyguts @ 10:35 pm

Getting back into using the book Organize Now! to guide my chaos taming has been very helpful! I’d forgotten I had a map for my next moves and it’s injected some vigor into my day.  I showed off my craft room a couple days ago and wanted to quickly review previous chapters since I moved into our new house.

I ended up reviewing all of the first four chapters again: Organize Your Mind & Life Vision, Organize Your Priorities, Organize Your Schedule, and Organize Your Cleaning Schedule. Very good reminders of the things I need to TAKE ACTION on to actually bring into my life – another motivating force.  I didn’t change much except for my chore list.  I haven’t done much cleaning since my first child was born (2.5 years ago!), so I adjusted my expectations and, after looking through Pinterest for ideas, changed how I organized and presented my chores. I’m pretty excited by this – I think it’s slick! The primary inspiration came from Of The Hearth’s tutorial, but I expanded it by adding more layers. Her chart shows rotating chores that aren’t scheduled by day, but here is my chart (not very pretty, though!) which is scheduled:


chores


  • The center, green square has the daily chores that can happen (although watering outdoor plants is no longer needed).
  • The yellow squares show the chores that can happen each day of the week and it repeats because that is how I was able to get it to fit with the month chores that come next.  It is meant to happen each week, not just the first two weeks of the month.
  • Purple squares are for monthly chores and I put them in specific date squares, but only because it spread them out evenly throughout the month.
  • And finally, the blue squares list chores that should happen once or twice a year.

I feel NO compulsion to adhere intently to these days, dates, or frequencies. I see this as a guideline for the ideal situation.

Back to the book, I flipped through the next group of chapters (Organizing Your Papers) and I felt I was keeping up with all of that great. The husband and I even organized our books in our office (non-fiction – by topic, and fiction by author)!  I did come across some books and things that I was keeping out of nostalgia and will be featured in future posts. And then they were all recycled!  Yahoo!

Now I am back to “Organize Your Things” group of chapters and should be organizing my car next. I want to create a comprehensive emergency kit in the car, so this will take a bit of research and saving for shopping to get it done.


October 9, 2014

Laundry room: washer/dryer pedistals

Filed under: home — fairyguts @ 12:44 pm

The first thing we needed in our new home was a washer and dryer. While it was nice to visit my folks a few times a week to do the laundry, the more pregnant I got, the less I wanted to cart our cloths around. After some research and discussion, we decided front loaders would be best for our family. I was undecided for a while. Our pros and cons were evenly balanced. Pros: water and electricity savings = money savings, easier loading/unloading, better energy tax rebates, better consumer guide ratings. Cons: less control over water levels (sometimes I like to use a lot of water depending on soil levels), can’t dye fabric, more expensive initial purchase. Honestly, my deciding factor was mentioned by a friend that she found her kids can reach in to them easier than top-loaders, therefore making laundry a chore they could assume earlier! Wahoo! Decision made!  In fact, Robin (now 2 1/2) can help me load them already!

Once we decided to go with front loaders, I really wanted a platform for them to go on.  It cost $200 EACH for the official manufacturer’s drawers, so that was out.  I looked around on Pinterest for inspiration. One style I saw a lot of used open spaces and laundry baskets, but I could imagine socks and toys getting tossed back there or falling out the back of the baskets and then I’d have to fish them out. I also imagined it’d end up a lint and hair sanctuary and it grossed me out just thinking about getting in there to clean it. So, I decided on drawers.

We measured the space and looked at the listed measurements for the washer and dryer we ordered and drew up a schematic. Just to make things interesting, we were trying to keep the price down by using supplies from the Habitat for Humanity ReStore – including the drawers. Once my Father, an experienced woodworker and contractor, reviewed our plans, we collected our supplies and put it together. The hardest part was finding drawers that would maximize the space and that matched.

2013-09-19 14.25.26

While we were shopping for appliances, we noticed that the cabinets in our kitchen and laundry room were purchased off the shelf at the Home Depot and that they offered a variety of wood pieces and moldings for finishing those cabinets. We decided to buy some of this and cover our platform in the same wood for consistency. This also helped us make the drawers match without having to wait for two, large, well made drawers to arrive at the ReStore. We knew it would be so much easier to get the drawer hardware installed before putting the top on the platform, so we needed the drawers right away.

2013-09-13 21.49.13

Remove the baseboard.

2013-09-14 00.42.58

Build the frame. Level everything as you go! Set the drawer in there just to look nice.

2013-09-14 00.43.26

Step back: looking good!

2013-09-14 14.00.09

Put the facing base on.

2013-09-15 21.58.36

Get husband to install drawer runners and supports.

2013-09-15 23.17.27

Put the top on and start installing the finishing boards.

2013-09-15 23.44.41

Glue.

2013-09-16 08.09.39

Lay the vinyl. Let Helper Baby pose.

2013-09-16 11.32.46

It’s going to look so nice once the drawers get their new fronts!

Then the day arrived and the washer and dryer were delivered. They were supposed to install them on the platform. But, when they got here, they showed us a piece of paper that they said we were told about when we ordered the appliances (I still haven’t looked that up, but I don’t remember being told this!) which says they can’t install on owner installed platforms.

2013-09-16 14.02.432013-09-16 13.01.33

So, we had to wait for Warren to get home. And then we needed more help, so we called my Dad. Good thing because I miss measured and we had to raise the cupboards so the W/D would fit! I was so embarrassed!  But it all worked out and they look lovely on their special base.

2014-10-06 16.30.532014-10-06 16.30.44

October 7, 2014

A Return to Methodical Organizing

Filed under: heart, home — Tags: — fairyguts @ 10:00 am

In a previous post, here, I talked about skipping “Chapter 14: Organize Your Crafts” of the book Organize Now! because we were going to be moving soon. Well, it’s been over a year since we moved and I can finally say my craft organization is done! Welcome to my craft room!  (Another photo-heavy post!! Sorry for the loading delay!)

I like to hang my fabrics for visibility. I am doing much better at sticking to my “no project, no fabric” (I have to have a SPECIFIC project in mind if I buy any fabric) rule, which explains why I have a relatively small amount of fabric.

image

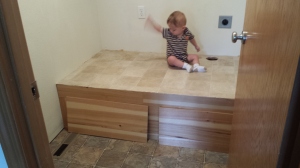
Alright, the closet isn’t immaculate, but my theory is this: those are mostly projects in this area and as I finish the project, it will leave the closet. So the best way to reach optimal closet cleanliness is to finish the projects. So, this is ok.

image

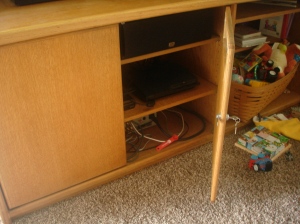
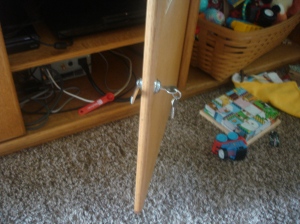
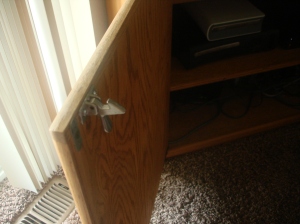
But, the rest of the room is perfect!  My old stereo is easily accessible – I still use it quite a bit! And it’s lovely having ALL of my crafting books right here with me! (The closed closet door clears up that closet mess)

image

I work hard to keep my leg room clear, otherwise I avoid working at the table and that leads to messes everywhere else in the house (ie: the kitchen counter).

image

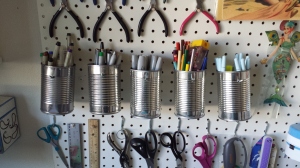
And here is the best part: My peg board! It has all the tools and notions for all my crafts (other, bigger and messier tools are in the garage).  I get all a-twitter at the color ordered items! Oooo!

combo

DSC00176

Closer look at the color scale of supplies.

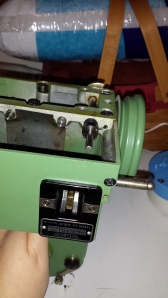
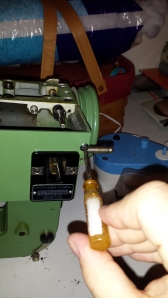
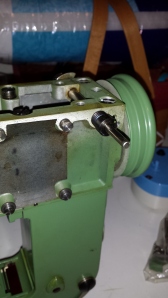
All of my machines are out and ready to use, although, I am planning on sewing covers for them to reduce dust and to keep little fingers from spinning knobs or getting poked or cut on needles or knives.
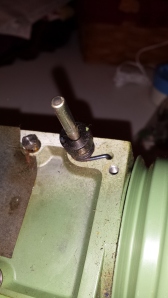
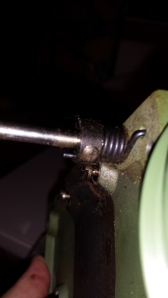
Some closeups:

I decided not to decorate my tin cans since I wanted the rainbow supplies to be the focus of color interest.

2014-10-06 12.36.05

Here are all my leather working supplies. I made a quick leather strap to hold my alphabet stamps and a shelf with scrap lumber for the other tooling stamps.

2014-10-06 12.36.17

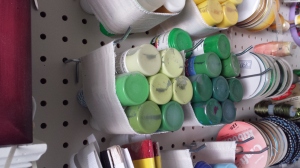
The part of this whole project that took the longest was deciding how to store the craft paints. I wanted to be able to see the colors, but have flexibility for waxing and waning supplies. It also needed to be able to fit with the other color items (a wooden divided box was less flexible) and it needed to be CHEAP. I bought 100 4″ pegs for $20, so most of the paint hammocks cost $0.40.

2014-10-06 12.36.35

I had the same cost issue with the ribbons. Everything I could come up with cost between $2 – $6 for each one and since I had 10 rows of color I wanted, that was $20-$60.  WAY too much for my taste!  So, with $0.40 worth of pegs and about $0.33 for wooden dowels, I ended up spending under $8 for the ribbon holders.

2014-10-06 12.36.53

I finally spun all my embroidery floss onto paper bobbins and, with $1 at the Habitat for Humanity ReStore, got me a dozen shower curtain rings to corral them.  Each serger thread cone is on it’s own 4″ peg.

2014-10-06 12.37.04

And, some final random progress pics:

DSC00019

Blank wall.

DSC00022

Peg board up and getting painted.

DSC00057

Messy embroidery floss!

DSC00056

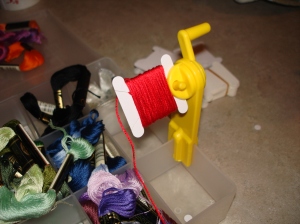
Didn’t take nearly as long as I thought it would with the help of this winder!

DSC00061

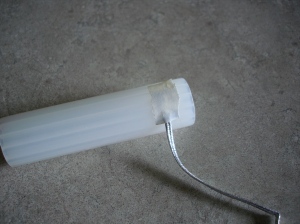
Winding ribbon onto receipt-paper spindles (make a cashier your friend!).

DSC00063

Wound ribbon.

2014-09-29 19.34.20

Some cut leather and two rivets – DONE!

2014-09-29 19.35.03

Wrapped and ready to hang.

October 6, 2014

Another mod to my 1954 Elna Grasshopper

Filed under: heart, home — fairyguts @ 5:43 am

I turned my electric Elna Grasshopper into a treadle table sewing machine. Well, I didn’t use it very much until we moved into our new home and found out quickly that leaving the flywheel brake on the machine was silly.  So I removed it.  Here are some photos – mostly incase I ever decide to put it back on the machine!

First, I disconnected the machine from the table top and turned it over.

2013-12-16 16.40.06

Remove the engine casing (engine is already gone).

2013-12-16 16.40.15  2013-12-16 16.40.49  2013-12-16 16.41.55

Notice that the knee-brake rod maintains its tension against the flywheel through the spring held to the rod via an inset screw and against the machine through a hole.

2013-12-16 16.42.20  2013-12-16 16.42.33

Notice, specifically, the turns of the spring and the location of the spring screws in case I want to put it back on someday.

2013-12-16 17.47.22 2013-12-16 17.47.09 2013-12-16 17.43.11 2013-12-16 17.42.56

Loosen the spring screw on the knee-brake rod, remove rod from the other side of the machine. Neglect to photograph any of that.

Screw machine back to the table top. Resume sewing.

October 4, 2014

Farewell to the old stove!

Filed under: home — Tags: , — fairyguts @ 5:43 am

I loved the stove that was in our Corvallis rental!  Such lovely lines, so functional, so substantial. It was quirky but once I cleaned it up and learned it’s moods, I enjoyed using it. Here is what I learned about it.

DSC00056

First, most of the pieces came apart easily! Lift and tug and they were out, ready for cleaning. A local repair and restorer told me to lay the burner pieces outside in the hot sun and liberally coat with oven cleaner, then scrub and rinse with the hose.

DSC00065

The left most burners, after removing the pot stands and the top surface. This is pre-cleaned.

DSC00067

Under the middle griddle section (also pre-cleaned).

DSC00068

And the far right burners.

Second, the burners were supposed to automatically ignite once you turned the knob to release the gas and heard the clicks, but sometimes they wouldn’t.  After the cleaning, all but one lit without help. The last one only needed a quick wave over it.  I felt the gas just wasn’t traveling down the tube to the pilot flame and when I waved my hand it forced gas down there.  But I made that up. All I know is it worked.

burner

The third thing I learned, was that manufacturers tried to think of everything back then. These flashy chromed surfaces under and beside the knobs was not just for looks.  They were pull out trays.  One set was the second over-flow catcher (you can see them under the burners in the second and fourth photos above).  One was a deeper tray that caught fat or spillage from the middle griddle.


DSC00071

Knobs and tray handles. The broiler did require a match to light, but the rest of the oven components had pilot lights.


Fourth lesson, was that cooking instructions were printed right on the oven doors! And they were good rules to follow!

DSC00072


The oven was the hardest part to manage.  In the door (seen open above) under the oven compartment was a burner which, if the pilot light was burning, would automatically ignite when the oven temperature knob was turned. But the pilot light was out when we first moved in and it took me months to even bother to try to fix it.

DSC00073


Getting the pilot light lit and to keep it lit was a challenge for one person.  Here’s the pilot light.  It needs to have gas coming out of it before you can light it with a match.  And then it has to stay lit for quite a while – over a minute – before the thermosensor gets warm enough to keep the gas flowing to the pilot light.  If you let go of the oven pilot light too soon, the thermosensor doesn’t recognize that there is a flame there and will turn the gas to the pilot light off.

Oven pilot copy


What makes this hard is that you are laying on the floor, reaching into the bottom of the oven holding something burning to the back wall while you are simultaneously holding the oven pilot light down – which is on the top of the oven, but the back, right burner.  To make it even more of a challenge, is that the button is very sticky. I had to use pliers and push it in and then pull it out repeatedly to get it to move smoothly.  BUT, once it’s moving and someone is holding it down for you, you can light the oven pilot light and you can finally bake you cookies.

primary gas


Blog at WordPress.com.