No Chaos No Order

June 11, 2015

Gallery wall: initials

Filed under: health, heart, home — fairyguts @ 3:46 pm

Ages ago, I mentioned a window picture frame I made for our gallery wall. Since I wanted to add some texture and other interest to the space, I decided to make some initials. I went with an art nouveau font, chose a letter for each of our last names, and printed them in a large size.

I drew the letters free hand to opened diaper boxes; cut the letters  out; then used glue, tape, and scrap cardboard to secure all the fold seams, free edges, and flaps.

2014-11-18 08.41.16

I cut up brown paper bags, tore any straight edges, and dipped in watered down glue. I applied two coats to my letters, letting each layer dry. The second layer covered any holes or bubbly edges from the first.

2014-11-23 12.34.08  2014-11-23 12.33.55

I experimented with paint washes and dry rubbing and, in person, the letters look a great deal like leather!

2014-11-25 11.13.26

I tacked them to the wall and, using paper cut to size of the frames I intend to use, I figured out how I wanted the gallery wall to look.

2014-11-29 13.15.32

This changed a lot before we settled on one.  I want to show how I turned two drawers into shelves before I reveal the finished wall. Stay tuned!

The best thing about this project is it was nearly free! I got to use trash and supplies on hand. I did have to buy another bottle of glue, but $2 is a great price for some large decorative pieces! Yay!

March 4, 2015

Car Emergency Kit

Filed under: health, home — fairyguts @ 10:38 pm

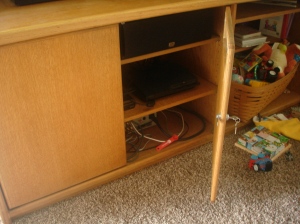
The next suggested area to tackle in the Organize Now! book is the car.  I have not cleaned or organized my car since Robin was born and I used to be quite particular about that.  I deep-cleaned my car at least twice a year: renting a carpet cleaner, using a toothbrush in the door spaces, and waxing the exterior.  Until recently, my car smelled like rotting milk and there were toys and crumbs everywhere.  Once I decided to super clean my car, my parents gave me their old one, so I avoided the cleaning after all, but had to move all of my things out of Bubbles, The Androgynous Adventure Van and into the new car (which has yet to be named).  While I was doing that, I noticed I have a woefully inadequate emergency kit. It worked well for a single gal, but a mother of two wouldn’t last an hour if there was an emergency.

I looked at several webpages to help me decide what to put in my kit, ranging from basic (“all a girl needs is a simple sewing kit and lip gloss!” – well, ok, not that simple or sexist) to complex (“live for 3 days out of your car when the world ends!”) and I have come up with my own lists.  I separated items into several lists to help me mentally and physically compartmentalize them and to provide a timeline for purchasing.  For example, the “Short Term Car Emergency Kit” list is, I think, the most important one to gather first because it’s the most likely to happen; then I’ll work on the “Long Term Emergency” list.
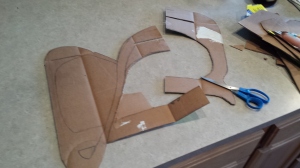
2015-03-01 17.37.34

Printed checklist.

Car Emergency Kit - Google Sheets

I really debated if I wanted to go so far as the “Long Term Emergency” kit.  A simpler, 24 hr kit makes sense to me – even if I’m not stranded in my car for a full day, I could use all those things for spontaneous road trips, or miss-packed vacations.  But, I don’t expect the world to end any day soon and the chances that I’d be in my car AND able to avoid the ensuing traffic jams are slim.  But then I thought

“Unless I veer off the road in the snow somewhere in the mountains!”

“Well, that’s why I don’t drive in the snow,” I responded.

“EXACTLY! When I’m driving in the mountains and a freak, sudden, snow storm I’m not expecting shoves my car into the ravine, I’ll need to be able to keep my children from dying until help arrives.”

… apparently I have gotten more paranoid since having kids. So, my Long Term kit is less “Survive the Zombie Hoards in Luxury and Repopulate the Earth” and more “survive some crazy drastic emergency in relative comfort until someone brings us back to civilization.”

Just a warning here: The more you collect, the more you think of adding! Maybe give yourself a limit by picking your storage containers first.

2015-02-18 15.27.15

Cell phone charger; tissues; pens, pencils, permanent markers, and paper; scissors; plastic bags; and a very simple first aid kit in one of the storage spaces in the front of my car.

2015-02-18 15.26.20

Proof of insurance, vehicle registration, and manuals in the glove compartment.

2015-02-18 15.27.50

Sunglasses, napkins, coin bank, diaper changing kit, and my special knit hat in a basket between the front seats.

2015-02-18 15.24.32

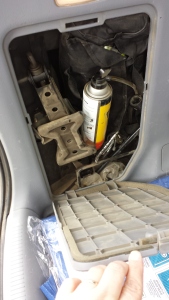
Tire changing supplies (jack, wrench, tire repair) and chains for the car in a hatch at the rear of the car.

2015-03-04 12.48.36

The bulk of the gear is in these containers: a backpack, an insulated lunch bag, and two plastic totes.

2015-02-18 15.24.09

The car-focused tote includes: Jumper cables, a glass marker, WD40, twine/rope, work gloves, multitool set, cable ties (zip ties), bright vest, wind-up flashlight, and a tarp.

2015-01-26 14.21.52

The backpack holds extra cloths for the boys (hoodie, hat, long sleeve shirt, pants, shoes and 2 pairs of socks) and two small, wool blankets.

This backpack is small and broken. If I had to carry my two babies away from the car, this bag would cause me unending discomfort.  I have a larger, more comfortable backpack that I will probably switch out sometime soon, but I’d like to try to carry the backpack AND sling both my kids before I decide to commit to it.

2015-03-04 12.49.42

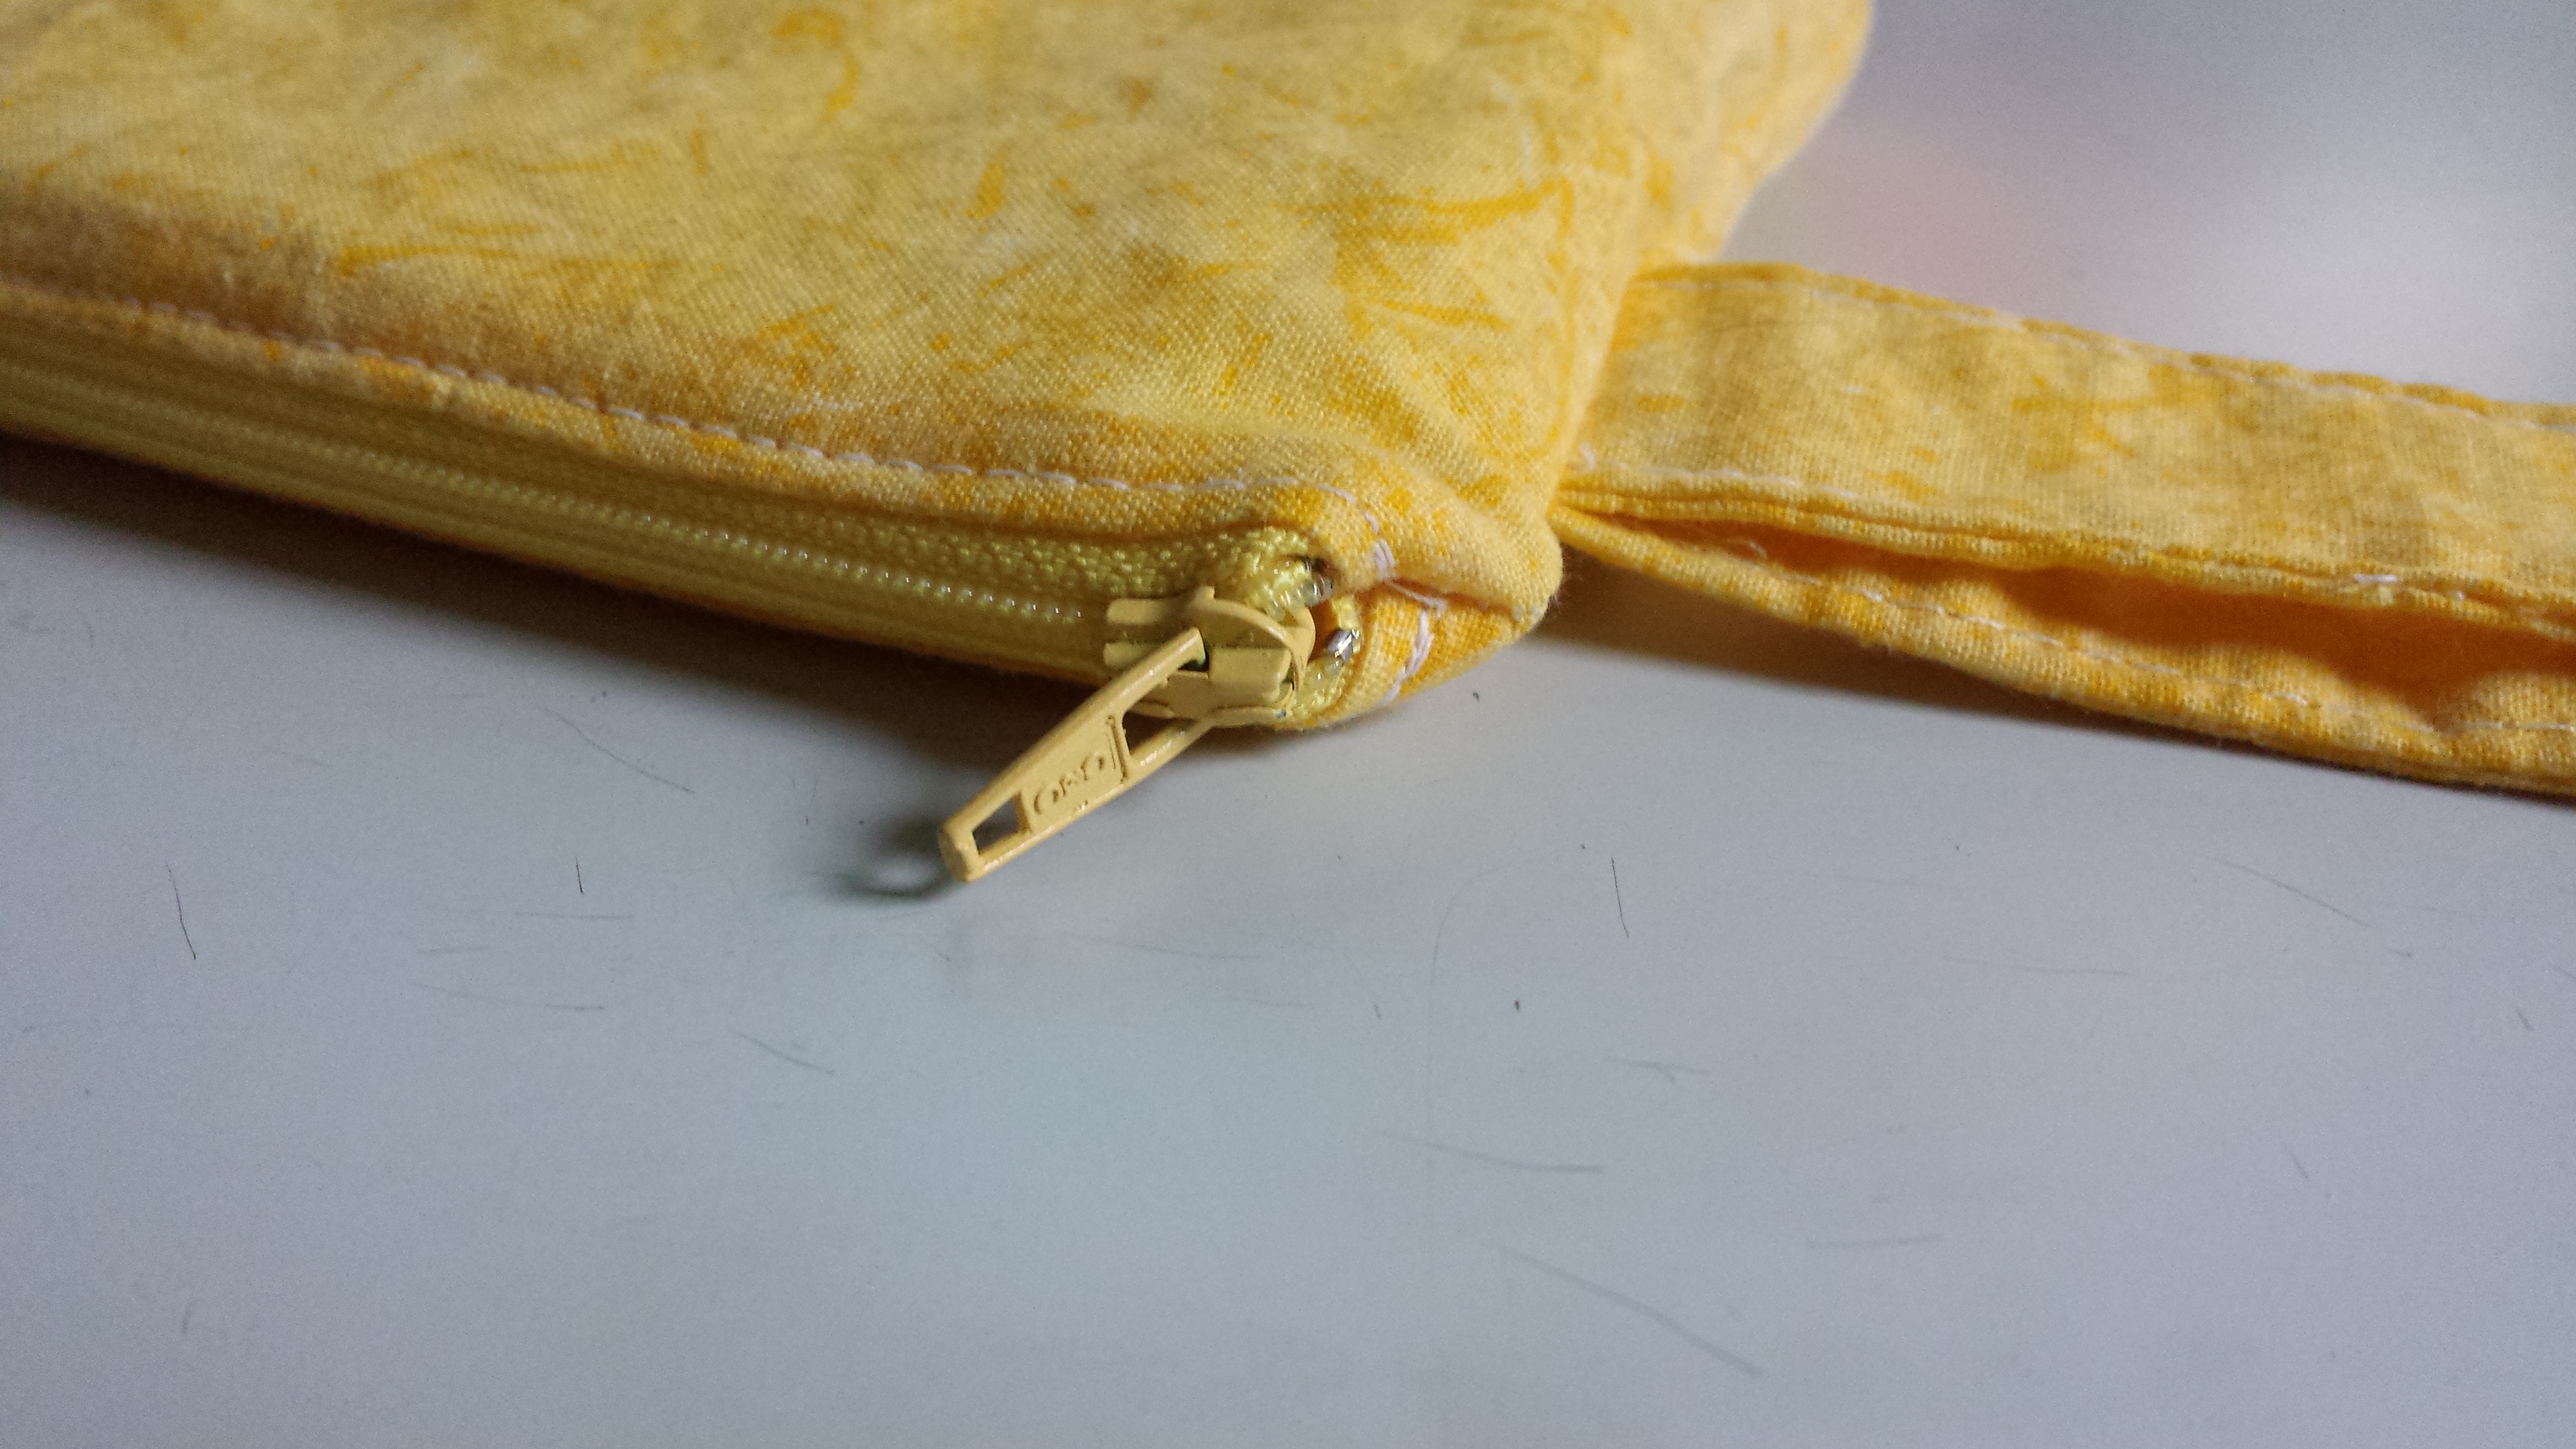
Ursula, at Home Made by Carmona (see link below) used an insulated bag for her kit and I thought it would be great for reducing temperature fluctuations on possibly sensitive items, as well as provide another liquid barrier in case of leaks. This one I found has two insulated zippered areas as well as three non-insulated pockets and a very long strap which I thought would come in handy if we had to leave the car. I decided to store personal hygiene items, the first aid kit (not made yet), and a part of the food and water (still collecting) in this bag.

2015-03-04 12.48.54

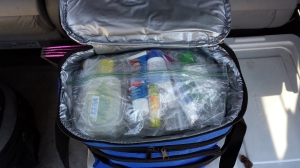
The top compartment holds the hygiene items in a large seal-able bag.

2015-01-26 14.20.19

Hygiene items (the glow sticks are in the second compartment): deodorant; toothbrushes, paste, dental floss, and hair ties; cotton swabs; nail clippers; lotion, sunscreen, and chap stick; hand sanitizer; liquid body soap; (not shown) diaper rash ointment; and bar soap.

2015-03-04 12.49.16

The bottom compartment holds some bagged water, baby formula, glow sticks, and bottle supplies.

Our doctor’s office hands out free formula samples, so I was able to get some smaller, sealed containers from them to put in this kit. Although, at the same visit, I got the go-ahead to start transitioning my baby to whole milk, so I won’t be needing the formula for much longer!  I realized later that my son uses around 1, 8oz tin of formula a day, so I really should have put three in this kit. But, since we’re moving to milk, I’m not going to worry about it.

2015-01-26 14.17.58

Some ‘dry’ hygiene items are kept in the second tote in their own sealed bag: compact, quick-dry travel towel; feminine pads; ear plugs; and bug repellent wipes.

2015-01-26 14.14.14

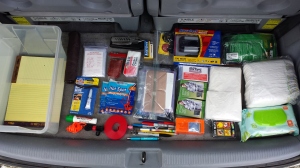
The second tote also holds: paper, pens, pencils, and permanent markers; rain poncho; army knife; multitool; super glue; hand warmers; tissue; whistle; extra cording; hook-and-loop ties; waterproof matches; a variety of plastic bags; four space blankets; some extra cash and coins; deck of playing cards; toilet paper; diapers; wipes; and a power adapter.

I have some other things I need to collect, but this will be sufficient for now!

Resources:

The bulk of my list came from Anita’s article on Live Like You’re Rich The Easy to Build Kit for the Worst of Times… Your Proven 72 Hour Survival Kit!  with some added ideas from the following articles: Family Van Emergency Kit by Ursula at Home Made by Carmona, Car Emergency Kit (With printable list) by Christy at Christy’s Cuties, How to Make a Winter Emergency Survival Kit for Your Car by Jenni at Sweet Pennies from Heaven,  Assembling a Car Emergency Kit with Printable Checklist by Angela at Food Storage and Survival.

October 27, 2014

Laundry Room: cleaning supplies

Filed under: health, home — fairyguts @ 5:27 am

Long ago I started an experiment around cleaning solutions. While I was looking for cleaner recipes to try out, I noticed a rash of Pinterest pins exclaiming “How to Turn a Mason Jar into a Squirt Bottle!” showcasing their finished projects. And, while I laud their accomplishments, I could not see the benefit in that. I couldn’t imagine my hand fitting between the trigger and the mason lid – I’d have to hold my smallest two fingers out. And then, because of the broad lid, I’d have to hold my hand cocked awkwardly perpendicular. But, finally, I was confused … I can understand the interest in using glass over plastic, but why not use the screw-lid glass water or juice bottles already available at most grocery stores? And, since I was using plastic bottles with squirting tops that were so crummy they only worked 60% of the time, I decided to do so.  In the experiment you can see the bottles with juice labels still on them, but following are the snazzed up versions for my snazzed up laundry cupboards.

2013-11-10 16.00.36

Galvanized buckets from a feed store ($8 each).

2013-11-12 14.25.59

An exacto-knife is my vinyl cutter to label my buckets of cleaning equipment.

2013-11-19 18.42.14

Nice and cozy in their home!

2013-11-19 18.41.20

Random storage needs are covered cardboard boxes. “Bulbs,” “Basics,” and “Batteries”

October 17, 2014

Media cabinet

Filed under: health, home — fairyguts @ 10:03 pm

In our old home our media equipment was stored in the basement – everything gloriously exposed, reveling in its awkward electrical hodg-podg-ery. Our new home, though, doesn’t have space for that. We decided to keep it in the living room and the mess of cables and flashing lights and game controllers was both a dust- and baby-magnet. To make it worse, we didn’t have furniture to accommodate it all. We used a sideboard with a folding table on top, and a homemade counter/table with landscaping fabric wrapped around the base.  We also used old boxes and sleeping bags shoved along sides and in spaces to keep our danger-baby from climbing up onto the rickety tables.  Mmmm – attractive!  (Which explains why there is no photograph.)

I couldn’t stand it any more and measured all of the things we wanted to be with the media and I started shopping.  We don’t have lots of money, so I needed to be careful with my funds.  I started haunting the Habitat for Humanit ReStore and finally found something to work…

2013-09-19 14.27.20

measurements and fantasy

2014-02-15 10.53.46

Ooo! A sale at the ReStore!

2014-02-15 10.52.41

Hmmm … A two-piece desk, but they are priced separately and the top one seems very promising.

2014-02-15 10.52.29

Ooo – totally acceptable price!

Before shopping, I wrote the measurements for each media component on its own post-it note to help me experiment with placement.

2014-02-15 10.51.50 2014-02-15 10.51.25 2014-02-15 10.51.10

If I add a second shelf inside the cupboard, everything would fit!  I bought it and sent my hubby back to bring it home.

I still had some changes to maximize the space and minimize the visibility of things or the possibility for kids to play with it.

First, we added a second shelf and holes in the back for ventilation.

DSC00174

A lock for one side and a latch for the other keeps the kids out.

DSC00172

DSC00173

But the trickiest part was cutting and finishing a hole in the cabinet door to put the center speaker inside. With some scrap wood behind the speaker, it rests directly against the door but little hands can’t push it out of the way to reach in.

DSC00171

I think it looks pretty nice now!  We still have the cable box out and another component that needs to be exposed for remote control use, but eventually I’d like to install glass doors in the far right opening to put them in. For now, we keep toys there!

September 30, 2013

Landscaping at our new home

Filed under: health, home — fairyguts @ 12:18 am

Our new house does not have a very big yard and very few established plants. And some of the ones that were here weren’t to my liking.  Two FREE posts to craigslist and I had takers for the unwanted plants in nearly 10 minutes.

The first to go was 5 rose bushes. I like rose flowers, but these were big, leggy bushes, with big thorns and a very light fragrance. I decided I’d rather go with a highly fragrant trellising rose in a different color and give these guys a home with someone who appreciated them.

DSC00091 DSC00094 DSC00095

This small hydrangea was oddly placed and interfered with parking as well as having sadly drab colors.  I know I could change the colors with soil additives, but hydrangeas are not high on my favorites list.

DSC00097 DSC00098

Now we have open holes, but it’s ready for me to put something I really like in there! Like more native plants!

September 26, 2013

Experiment: all purpose cleaner

Filed under: health, home — fairyguts @ 1:15 am

In my research and experimenting with home made laundry detergent, I decided I needed to test my all-purpose cleaner.  As I mentioned earlier, I’ve been using home made household cleaners for several years now to avoid lung irritation and had been using combinations of baking soda, vinegar, castile soap, and/or borax.  “All Natural Non-Toxic cleaner” recipes have similar ingredients and inflated claims of efficiency, but some ingredients are not compatible, resulting – most visibly – in precipitate solids.  What part of these cleaning recipes are actually useful?

I made a lot of decisions which significantly narrowed the scope of this experiment.

  • Freshness.  I had read on some blogs that you had to make your cleaner fresh each time you used it.  I considered using two spray bottles per cleaner: one would be made up and used for the the full duration of the experiment (over several weeks), while the other bottle would have a fresh batch made up each time.  I discarded this option primarily for logistics: I didn’t have another 6 spray bottles.
  • Specialization.  I thought about testing a variety of both all-purpose AND glass cleaners.  On reflection, I decided what was different about these two types of cleaners was that one had to leave no residue.  I decided I would prefer all of my cleaners to leave no residue, so I would only test one type of cleaner and make residues a condition of cleaning determination.
  • Vinegars. In my reading, there were claims that orange peels soaked in vinegar increased its cleaning effectiveness and improved the smell.  I made some and used it as one of my cleaners to test this claim.
  • Situations.  I created a list of situations I would like to test the cleaners on including: greasy walls, dust build up, food drips on cupboards, finger prints, bug smeared windows, mildew, and soap scum. For the experiment, I needed to be able to recreate these situations in equal amounts and, although I thought of ways to test most, logistics were prohibitive. I felt testing oil and dried food would be sufficient at this time.
  • Measurements.  I looked up ways people measured cleanliness and, in manufacturing settings, there are some high-tech light refraction methods, but they often use black light and white glove visual inspection with “pass/no pass” identification.  I decided I would just use visual inspection, as I would in my daily cleaning routine.
  • Wiping cloths. Since these experiments inform how I clean my own house, and I am a microfiber devote (although, perhaps I should do a third experiment!?!) I elected to use the same ones I have been using for years.  I had enough new cloths to have one specifically for each cleaner. I debated about washing the cloths between each soiling type and elected not to, since this would most closely reflect how I would use it.

Hypothesis:  Home-made all-purpose cleaner made with water and vinegar cleans better than cleaner made with borax or castile soap.

Prediction: Home made cleaners made with a combination of vinegar and baking soda or vinegar and borax are problematic because of the neutralizing effect the ingredients have on each other (depending on concentrations).  Additionally, cleaners made with borax and castile soap create precipitates which damage the spray bottles and leave particulates on the surface being cleaned.  I predict a cleaner with only vinegar and water will clean better than a cleaner made with castile soap or borax.

Independent Variable: All-Purpose Cleaners

Dependent Variable: Two soiling types (olive oil and dried food on glass).

Materials:

  • (6) Home made all-purpose cleaners

2013-09-19 17.05.26
2 c water and 1 T borax
2 c water
1 c water and 1 c vinegar
1 c water and 1 c orange vinegar
1.5 c water and 2 t castile soap
1.5 c water and .5 c vinegar and 1 T borax


  • (5) Glass tiles
  • (6) New microfiber cloths.
  • Soiling types (olive oil and food (cake batter, mustard, raw egg))

Procedure: 

  1. Soil each tile with equal amounts of soiling (olive oil or dried food).
  2. Spray the devoted microfiber cloth three times with the cleaner.
  3. Wipe.
  4. Evaluate (pass/no pass)
  5. Repeat 2, 3, and 4 until pass.

Observation:

Olive Oil –

DSC00103  DSC00104

  1. N N P
  2. P
  3. P
  4. N N N N N
  5. N N N N N P
  6. P

Dried Food –

DSC00107

  1. N N N N N N N N N N * N N N N N N N N N N % N N N N N N N N N N N N N N N N N N N N+
  2. N N N N N N N N N N * N N N N N N N N N N % N N N N N N
  3. N N N N N N N N N N * N N N N N N N N N N % N N N N N N N N
  4. N N N N N N N N N N * N N N N N N N N N N % N N N N N N N N N N N N N N N N N N N N+
  5. N N N N N N N N N N * N N N N N N N N N N % N N N N N N N N N N N N N N N N N N N N+
  6. N N N N N N N N N N * N N N N N N N N N N % N N N N N N N N N N N N N N N N N N N N+

DSC00108DSC00109DSC00110

* At this point, cleaner #2 has cleaned the best, but not completely. I changed the method by squirting the glass directly and letting sit for 1 minute before resuming the spray-and-wipe method.

DSC00111DSC00112DSC00113

% Again, #2 is the best so far with #3 a close second.  I squirt each glass with cleaner and let sit for 3 minutes.  All but cleaner #2 and #3 needed more than 20 more wipes to finally pass.

DSC00114DSC00115DSC00116

The orange oil vinegar cleaner itself left an oily residue on glass, so no matter how much I cleaned with it, it left a smear. Here you can see particulates, too.

DSC00105

Conclusion: Plain water was the most successful all-purpose cleaner.  Further tests need to be conducted to determine if other detergent recipes with a variety of ingredients and their ratios are more or less effective than plain water.

Discussion:  This experiment has prompted me to reduce my cleaning supplies even further. Even though pure water was the best cleaner in this case, I will continue to add vinegar to my cleaning solution.  I like the smell, supposed mineral-dissolving-properties (not tested here),  and the reported bacteria, mold, and mildew killing properties.  Paired with my baking soda pastes, I believe this is all I’ll need for my home!

August 4, 2013

Bringing it back into focus.

Filed under: health, heart, home — fairyguts @ 4:59 am

1) Since we’ll be moving soon I need to change gears from trying to situate the house we’re in now for my optimal function to preparing for a move at the end of August.  I need to be more aggressive in getting rid of what we don’t need and start packing the things left in a thoughtful way for easier unpacking and optimal organizing in the new location.  I also need to think about what we need out and available now, or packed and easily accessible just-in-case.   So, to start that, I think I need boxes!!  I know we have some in the attic, so I’ll ask the hubby to get them tomorrow.

WVMLS663806H WVMLS663806D

WVMLS663806F

2)  Keep weeding at the place we’re in.  I let things get really out of hand last summer (what with tending to my tubed-up baby and pumping every three hours and all) so I need to get the grodies under control before we bail.

2013-07-20 18.17.33 2013-07-20 18.17.20

2013-07-20 18.17.12 2013-07-20 18.17.48

3)  I need to get better at preparing real food for Robin to eat every day.

June 3, 2013

Freezer meals, revisited

Filed under: health, home — fairyguts @ 4:38 am

I didn’t like most of the freezer meals I made at the beginning of the year, so I stopped doing it.  But we are over spending and over eating and this was so helpful in minimizing that. So, I’m looking for new recipes.

In a previous post, I also wrote about how I was going digital with my cook book.  But, now that I’m out looking at recipes, I end up having to copy-paste them line-by-line into my current cookbook.   AND, when I want to calculate their calories and other macro nutrient contents, I’ll have to copy-paste them into a different recipe aggregate.  BLAH.  I am not happy with this.  But I don’t want to pay for a service that does it all.

Anyone have an alternative?

May 31, 2013

Scrapbook: DONE!!

Filed under: health, heart, relationship — fairyguts @ 6:32 am

Yay! I finished Robin’s hospital scrapbook! I think it turned out well.  I don’t have super-cute and involved layouts and decorations, but it’s still interesting to look at as well as read.

2013-05-30 17.02.09

Here are a couple of my favorite pages. This first one I especially like because I used string to point to the things that were on Robin.  I think this helped emphasize how bound he was and how it made people feel that he was unapproachable.

2013-05-30 17.02.40

This one took a lot of time. At Doernbecher there was a family relations person who hosted luncheons and craft times. One of the things she had was “story beads”. She had made a list of common things families with babies in the NICU went through and paired a unique bead with each event.  The idea was that you could string all these beads together to represent your child’s story.  I decided to be super elaborate (of course) and made it a timeline.  Each silver bead is a day starting with February 26th (the day I was put on bed rest).  Each event I put immediately after the appropriate day. Finishing that up took a while (I just *had* to run to the bead store, now didn’t I?) but then, since it would be too thick and awkward in the scrapbook, I scanned the strand and deleted all the scanning junk around the beads before labeling all the beads!  In the photo I’ve included the actual bead strand above the finished printed version.  The strand will hang up in Robin’s room someday.

2013-05-30 16.41.10

I’m leaving it out for a while so people can look at it, but then it’ll be packed away and brought out only once in a while until all the kids are older.

May 22, 2013

Unexpected extras for cloth diapering

Filed under: health, heart, home — fairyguts @ 5:20 am

Well, not *completely* unexpected – I know I have seen people discussing “wet bags” as I’ve been reading up and shopping for our cloth diaper transition. But I didn’t think to apply it to me: I need wet bags!  And, since I’m broke, I decided to make my own!  I bought supplies for $7.80 at Joann’s (using coupons, etc) and made three wet bags. One is perfect for holding dirty dishes, another for prepared and clean cloth wipes, and the third is not ideal for the used diapers and wipes (yet).  I sewed up each bag slightly differently.  I primarily looked at this All Wrapped Up blog article (great photos, simple, efficient, and nicely finished instructions) and added my own methods as I went.

For all three I decided to put the shiny side of the PLU as the interior of the bag – open the bag and there is the shiny PLU.  It made sense to me that if poo got smeared on it, it would come off the plastic more easily than the fabric side of the material.  So, for my zipper I placed PLU (shiny side up), zipper (right side up) and fabric (wrong side up) before stitching, turning, and top stitching.

2013-05-18 10.14.09

I also did not cut the bottom of the fabric pieces. I cut the material expecting the fold to be at the bottom of the bags.  I left an opening for turning in the side of the cotton fabric. I decided the extra sewing might damage the PLU if I did it there and soiling might get in the exposed ridges of the stitching otherwise.

2013-05-18 11.21.01

I created box corners on the two yellow bags and left the corners flat on the grey bag.

2013-05-19 19.15.29

Now, my first bag had issues.  Well, they all do , of some sort… I was using zippers I had on hand. This zipper wasn’t long enough and after it was installed and top stitched, it left big gaps between the zipper and the edge of the bag.  I cut scraps of fabric and PLU and sewed them over the gaps.

2013-05-19 12.13.142013-05-19 19.01.30


I think it looks cool stitched up!  This one is for clean wipes.

2013-05-22 06.36.482013-05-19 19.22.11


The second bag didn’t have any significant issues.  I just don’t like how the bulk of the zipper makes the corners bulge out. This one is for used dishes and can be attached to the diaper bag strap.

2013-05-22 06.35.362013-05-22 06.35.46

This zipper was also a little short, but I prepared better and it fits relatively well.

2013-05-22 07.22.092013-05-22 07.41.57

The downside is, while it’s a good size to hold several wet diapers, the zipper opening is not very wide and requires two hands to put the dirty diapers in. This can be problematic when handling a squirrely naked baby! 😀

2013-05-22 07.42.13

So, all done! They match my diaper bag and are darn effective. I more than payed for it in the use they’ll get and the hours of entertainment I got from playing with fabric! 😀


Older Posts »

Blog at WordPress.com.